Saturday, 5 March 2011

81-desktop ေပၚကAlarm clock

ကိုယ္႔ကြန္ျပဴတာ Dasktop ေပၚမွာ Alarms Clock ရဲ့ Skin လန္းလန္းေလးနဲ႔ အလွဆင္ၾကရေအာင္ေနာ္။
ေမ႔ေလ်ာ႔တတ္တဲ႔သူေတြအတြက္ ကြန္ျပဴတာသံုးရင္းအခ်ိန္ကို တန္းဖိုးရွိရွိ သံုးလို႔ရသြားတာေပါ႔။
ပထမဆံုး..ေအာက္ကလင္႔ခ္ေလးကို ကလစ္ေပးျပီး ေဒါင္းလိုက္ပါ။


ဒီေနရာေလးကလစ္လိုက္ပါ။
c5ad755faecc66983d0d6d49e5b7bd00.jpg
အေပၚကေပးထားတဲ႔လင္႔ခ္ေလးကိုInstall လုပ္ၿပီးရင္ ခုလို Clock ပုံကုိ ေတြ႕ရပါလိမ့္မယ္။
တကယ္လုိ႕ မေတြ႕ရဘူးဆုိရင္ေတာ့ Start menu ===> All Program ကေနဖြင့္ျပီးရွာလိုက္ပါေနာ္။
အရင္ဆံုး  Skin ေျပာင္းၾကည္႔ၾကမယ္။ပုံထဲကအတုိ္င္း နာရီေပၚမွာ Right Click ၿပီး
Options မွာ Appearance tab ကုိကလစ္ၿပီး ပုံထဲကအတုိင္း Background ေအာက္မွာ စိတ္ႀကိဳက္ေရြးခ်ယ္ေပးနုိင္ပါတယ္။
1.png
ေနာက္တစ္ခုကေတာ႔  Alarms ေပးထားမယ္ဆိုရင္ေတာ႔
ပုံထဲကအတုိင္း နာရီေပၚမွာ Right Click ၿပီး Alarms ကုိကလစ္မယ္။
002.PNG 

forward : mail ...မွ

လိုတာသာ download လုပ္ၾကေတာ့ေနာ္


79-talk မွာ တင္ထားတဲ့ ပံုေလးေတြကို တစ္ပံုျပီး တစ္ပံုေျပာင္းခ်င္တယ္ ဆိုရင္

Gtalk မွာ တင္ထားတဲ့ ပံုေလးေတြကို တစ္ပံုျပီး တစ္ပံုေျပာင္းခ်င္တယ္ ဆိုရင္ ေအာက္မွာေပးထားတဲ့ ဖိုင္ေလးကို ေဒါင္းလိုက္ ပါ သူက ရုိးရုိး Gtalk နဲ ့ေတာ့ မတူဘူး သူအေပၚနားမွာ Shell ဆိုတာေလး အပိုပါတယ္ ကိုက ပံုေလးေတြ ေျပာင္းခ်င္တယ္ဆိုရင္ သူ ့ကို RUN လိုက္ပါ ျပီးရင္ေတာ့ အေပၚမွာပါတဲ့ Shell ဆိုတာေလးကို ႏိုပ္လိုက္ပါ ျပီး၇င္ Options ကိုသြားပါ ဘယ္ဘက္မွာ Avatar ဆိုတာကို ႏိုပ္ျပီးေတာ့ Add ကိုႏိုပ္ပါ ျပီးရင္ ပံုရွိတဲ့ ေနရာကေန ပံု 2..3..4...ကိုထည့္ခ်င္တဲ့ပံုမ်ားကိုယူပါ အဲ့ဒါဆိုရပါျပီ ok ေပးလိုက္ပါ ျပီးရင္ေတာ့ ကို Gtalk မွာ ပံုေလးေတြ တစ္ပံုျပီးတစ္ပံုေျပာင္းေနပါလိမ္.မယ္။ 

Friday, 4 March 2011

window 7 - 64 bit မွာ ေဇာ္ဂ်ီ ယူနီကုတ္အလုပ္မလုပ္ဘူးျဖစ္ေနရင္ ဒီမွာ ဒါေလး install လုပ္လိုက္ပါ


(သိၿပီးတဲ့သူမ်ား ေဆာရီးပါ)ပထမ အဆင့္ အေနနဲ ့ ကၽြန္ေတာ္ တို ့ install လုပ္ေနၾကအတိုင္း
  ဒီမွာ download လုပ္ပါ


ေဇာ္ဂ်ီ ယူနီကုတ္ ကို install လုပ္လိုက္ပါ။ 


ျပီရင္ေတာ့ ဒါေလး ထပ္ျပီး install လုပ္လိုက္ေပါ့ေနာ္...
  ဒီမွာdownload လုပ္ပါ

ပထမ အဆင့္ကေတာ့ ကၽြန္ေတာ္ တို ့ install လုပ္ေနၾကအတိုင္း
ေဇာ္ဂ်ီ ယူနီကုတ္ ကို install လုပ္လိုက္တာပါ...
ဒုတိယ အဆင့္ ကေတာ့ ေဇာ္ဂ်ီ အဖြဲ ့သားေတြ windows 64 bit အတြက္ ျပဳလုပ္ေပးထားတဲ ့ zip ဖိုင္ေလးပဲ ျဖစ္ပါတယ္


windows 64 bit အသံုးျပဳ သူမ်ားအားလံုး အစဥ္ေျပၾကပါေစေနာ္...


Thursday, 3 March 2011

77-Downloadလုပ္နည္းႏွင့္ စက္ထဲInstallလုပ္ပံု RealplayerSP

Videorမ်ားကို ေဒါင္းရန္အတြက္ ေအာက္ပါပံုမ်ားၾကည့္ၿပီး Real Player SP ကို ( ဒီမွာ ) ေဒါင္းၿပီး
မိမိ၏စက္ထဲသို႔ Install ထည့္ထားပါ။ မိမိၾကည့္ေနေသာ ဆိုဒ္မ်ားမွၾကိဳက္ရာVideoမ်ားကို ေဒါင္းႏုိင္ပါတယ္။
(သိၿပီးတဲ့သူမ်ား ေဆာရီးပါ)

ပံု (၁) Download Now အားကလစ္ပါ


ပံု (၂) Save File ကိုႏိုပ္ပါ 100% ၿပည့္ၿပီးက My Computer ထဲမွာ Softwareအား ကလစ္ပါ


ပံု (၃) Real Player Software ေလးပါ


ပံု (၄) ထိုကဲ့သို႔ေပၚလာၿပီး Accept ကိုကလစ္ပါ


ပံု (၅) Next ကိုသာ ကလစ္လိုက္ပါ


ပံု (၆) မိမိ၏ browser မပိတ္ခ်င္ကCancel ကိုႏွိပ္ပါ။ က်ေနာ္ကေတာ့Cancel နွိပ္လိုက္တယ္ဗ်ာ။ၿပီးရင္100%ၿပည့္ေအာင္ခဏေစာင့္ပါ


ပံု (၇) ထိုကဲ့သိုေပၚလာရင္ (Basic Real Player) ကိုႏွိပ္ၿပီး ထိုပုံအား Close လိုက္ပါ


ပံု (၈) ထိုကဲ့သိုေပၚလာၿပီး။ ထပ္ၿပီး Close လိုက္ပါ။ ဒါဆို Ok သြားပါၿပီ

ပံု (၉) က်ေနာ္တို႔ ပံု(၈) မွာCancel လုပ္ထားတာေၾကာင့္မိမိ browser အားကလစ္ၿပီး Enter ၿပန္ႏွိပ္လိုက္ပါ


ပံု (၁၀) ဒါဆိုမိမိၾကည့္ေနေသာ Videoေပၚကို ၿမွားေလးတင္လိုက္ရင္ ထိုကဲ့သို႔ စာေပၚလာပါၿပီး ထိုစာအားႏွိပ္ၿပီး ေဒါင္းႏုိင္ပါၿပီ။

ပံု (၁၁) ထို Clear ကေတာ့မိမိေဒါင္းထားတာေလးေတြရွင္းၿခင္းပါ။ မိမိ၏ Videoမ်ားကေတာ့My Computer ထဲရွိ My Video ထဲတြင္ရွိေနပါသည္။


Wednesday, 2 March 2011

76-မိမိရဲ႕InternetHomePageSearchEngineအတြက္အေကာင္းဆံုးဆိုက္

အခုတေလာအလုပ္ေတြအရမ္းမ်ားေနလို႕ဘာမွမတင္ျဖစ္တာက်ေနာ့္ဘေလာ့မိတ္ေဆြကိုစိတ္မေကာင္းပါဘူးလို႕ေျပာပါရေစ။အရမ္းကိုအေရးၾကီးတဲ့ကိစၥ
ေတြေၾကာင့္ပါ။ဒါေၾကာင့္၇တဲ့အခ်ိန္ေလးမွာမိမိရဲ႕InternetHomePageSearchEngineအတြက္အေကာင္းဆံုးဆိုက္ေကာင္းေလးတင္ေပးလိုက္ပါတယ္။
ဘေလာ့မိတ္ေဆြအားလံုးကိုလည္းအထူးဘဲေက်းဇူးတင္ပါတယ္။အခုတင္SearchEngineကမိမိရဲ႕ၾကိဳက္နာမည္တတ္ေပးလို႕ရပါတယ္။ျပီးေတာ့အျခား
Socialဆိုက္Facebookအစအကုန္လံုးAutoရွိပါတယ္။Gmail,Yahoo,Hotmail,အစံုပါဘဲ။ေအာက္မွာပံုနဲ႕တကြျပထားေပးပါတယ္။ဥပမာYoutubeကို
ဖြင့္မယ္သီခ်င္းေတြနားေထာင္းမယ္ဆိုရင္လည္းရွိျပီးသားပါထပ္ႏိုပ္စရာပါဘူး၊ေရြးေပးလိုက္ရင္ရပါျပီ။ၾကိဳက္ၾကမယ္လို႕လဲေမ်ာ္လင့္ပါတယ္။
ေအာက္မွာလင့္ခ္ေပးထားပါတယ္။
http://www.shinysearch.com/myhome.php?style=logolinks&ltext=KP-3FAMILY


FireFox Users:ေတြအတြက္

   1. Copy the below website address
      http://www.shinysearch.com/myhome.php?style=logolinks&ltext=KP-3FAMILY
   2. Click the "Tools" menu in the top & then click on "Options..."
   3. Click on the "Main" image on the top left
   4. Delete the contents in the "Home page" field, then paste the copied website address Click Ok.

Internet Explorer Users:ေတြအတြက္

   1. Copy the below website address
      http://www.shinysearch.com/myhome.php?style=logolinks&ltext=KP-3FAMILY
   2. From the "Tools" menu at the top of the screen, choose "Internet Options...".
   3. Find and choose the "General" tab.
   4. Delete the contents in the  "Address" field, then paste the copied website address.
      Click the OK button.
ေအာက္ကလင့္ခ္

(http://www.shinysearch.com/myhome.php?style=logolinks&ltext=KP-3FAMILY)
မွတ္ခ်က္။KP-3FAMILYေနရာမွာမိမိၾကိဳက္တဲ့အမည္ေရးေပးလိုက္ပါ။

မသိေသးတဲ႔မိတ္ေဆြေတြကိုအသိေပးမ်ွေဝေစခ်င္ပါတယ္၊
from;;KP-3FAMILY

Tuesday, 1 March 2011

75-GTalk တြင္ လိမ္လည္ေနေသာသူမ်ားကိုရွာေဖြရန္

Gmail address တစ္ခုကို သိရံုနဲ႔ သူဟာ ဘယ္ႏိုင္ငံကလဲဆိုတာ သိႏိုင္ပါတယ္။ ၿပီးေတာ့ သူ႔ဆီကို Mail တစ္ေစာင္ပို႔တဲ့အခါ သူဟာ အဲဒီ ေမးလ္ကို ဖတ္လား မဖတ္လား ဆိုတာကိုလည္း သိႏိုင္ပါတယ္။ Website ႏွစ္ခုကို အသံုးျပဳၿပီး လုပ္ႏိုင္ပါတယ္။ ပထမဆံုးတစ္ခုက Spypig ပါ။

Browser ကေန New Windows တစ္ခုကို ဖြင့္လိုက္ပါ။

http://www.spypig.com/


ကိုသြားလိုက္ပါ။
ေနာက္


Windows တစ္ခု ထပ္ဖြင့္ၿပီး ကိုယ့္ Gmail ကိုဖြင့္ထားပါ။ Compose Mail ကိုႏွိပ္ထားပါ။
Spypig ရဲ႕ Step1 Text box မွာ ကိုယ့္ email ကိုရိုက္ပါ။


Step2 မွာ Subject ထည့္ပါ။

Step3 မွာေပးထားတဲ့ ပံုေတြထဲက ကိုယ္ႀကိဳက္တာကို ေရြးပါ။

Step4 မွာ 3 ကိုေရြးပါ။
ၿပီးရင္ Click to Activate My Spypig ဆိုတဲ့ button ေလးကို ႏွိပ္လုိက္ပါ။
အဲဒီအခါ ေအာက္မွာ စကၠန္႔ေတြပါတဲ့ ပံုေလးတစ္ပံု ေပၚလာပါလိမ့္မယ္။

အဲဒီပံုေလးကို ႏွိပ္ဆဲြၿပီး Gmail ရဲ႕ Body ထဲမွာ လႊတ္ခ်လိုက္ပါ။
ၿပီးရင္ တျခားစာေလးဘာေလးစသည္ျဖင့္ ရိုက္ထည့္ၿပီး Send ကိုႏွိပ္လိုက္ပါ။
ကိုယ္ပို႔လိုက္တဲ့သူက ကိုယ့္ Mail ကိုဖတ္လိုက္တဲ့အခါမွာ Spypig ဟာ Mail
ဖတ္ၿပီးတဲ့အေၾကာင္း သတိေပးစာကို ကိုယ့္ Gmail ဆီျပန္ပို႔ေပးပါလိမ့္မယ္။
အဲဒီထဲမွာ ဖတ္တဲ့သူရဲ႕ IP လည္း ပါပါတယ္။
ဒါဆို သူ႔ရဲ႕ IP သိသြားပါၿပီ။ ဘယ္ႏိုင္ငံကလဲ ဆိုတာကိုေတာ့

http://www.ip2location.com/free.asp

ကိုဖြင့္ၿပီး အေစာက IP ကို ရိုက္ထည့္ေပးလိုက္ရင္သူဟာ ဘယ္ႏိုင္ငံကလည္းဆိုတာ ေပၚလာပါလိမ့္မယ္။ 

kozaw357 မွ ...

74-ကြန္ပ်ဴတာ အေျခခံ အပိုင္း (၇)

ကြန္ပ်ဴတာ အေျခခံ
အပိုင္း (၇)


ဒီေန ့ေတာ့ မိမိကြန္ပ်ဴတာကို ျပဳျပင္ထိန္းသိမ္းတဲ့နည္းေလး ေျပာျပပါ့မယ္…

ကိုယ္ပိုင္စက္နဲ ့ အင္တာနက္သံုးတဲ့သူေတြအတြက္ အသံုး၀င္မယ္လို ့ ထင္ပါတယ္…

ကြန္ပ်ဴတာကို သံုးတာၾကာလာတဲ့အခါ စက္ေလးလာတာတို ့၊ သိမ္းရခက္တာတို ့ ျဖစ္လာတာကို ၾကံဳဖူးမွာပါ…

၁။ အင္တာနက္သံုးတဲ့စက္ဆိုရင္ Website တစ္ခုကို ၀င္လိုက္တာနဲ ့ ကိုယ္ၾကည့္တဲ့ Web Pages ေတြ၊ ပံုေတြကို Temporary Internet Files မ်ားအျဖစ္ Hard Disk မွာ သိမ္းထားတတ္ပါတယ္…

၂။ မိမိ ၀င္တဲ့ Web Page က ပံုေတြ၊ သီခ်င္းေတြ Download လုပ္တဲ့အခါမွာလည္း Downloaded Program Files မ်ားကို Hard Disk က သိမ္းထားတတ္ပါတယ္…

၃။ မိမိ မလိုခ်င္လို ့ ဖ်က္လိုက္တဲ့ Files မ်ားဟာ Recycle Bin မွာ ရိွေနတတ္ပါတယ္… လံုး၀ မလိုခ်င္ေတာ့ဘူးဆိုတာ ေသခ်ာတယ္ဆိုရင္ေတာ့ Empty the Recycle Bin လုပ္ရပါမယ္…

၄။ တစ္ခ်ိဳ ့ေသာ Program မ်ားကလည္း Temporary Files မ်ားအျဖစ္ Hard Disk ေပၚမွာ သိမ္းထားတတ္တဲ့အတြက္ Hard Disk ရဲ့ ေနရာကို ယူထားတတ္ပါတယ္…

ဒီအခ်က္ေတြေၾကာင့္ မိမိကြန္ပ်ဴတာရဲ့ Hard Disk ရဲ့ Free Space ကို ျပန္လည္ရယူႏိုင္ရန္အတြက္ Disk Cleanup ဆိုတာ လုပ္ေပးရပါမယ္…

Disk Cleanup လုပ္ရင္ ဘယ္အရာကို ဖ်က္မလဲဆိုတာ ေမးပါတယ္…

Disk Cleanup လုပ္ၿပီးရင္ေတာ့ စက္က သံုးရတာ ျမန္လာၿပီး Hard Disk မွာ သိမ္းရမဲ့ေနရာ ပိုလာတာကို ေတြ ့ရမွာပါ…


Use Disk Cleanup to remove unneeded files

You can use Disk Cleanup to find and remove files that are no longer needed. This can increase the amount of available space on your hard disk.

Disk Cleanup can find four types of files. You can select which of the four types of four types of files you want to remove from your disk.

Temporary Internet files are Web pages and images Windows stores on your hard disk while you are browsing the Web. Using temporary Internet files saves Windows from having to transfer the same pages and images to your computer each time you view them.

Downloaded program files are small programs that some Web pages require to display properly or to perform certain functions. These programs are transferred to your hard disk when you visit the Web page.

The Recycle Bin contains files you have deleted. These files are permanently removed from your computer when you empty the Recycle Bin.

While working, some programs store temporary files on your hard disk. If these files are not removed when the program has finished using them, they can take up valuable storage space.


ေနာက္ျပဳျပင္ထိန္းသိမ္းရမဲ့ နည္းလမ္းကေတာ့ Defragmenter ဆိုတာကို ျပဳလုပ္ေပးတာပါ…

မိမိကြန္ပ်ဴတာကို သံုးတာၾကာလာတဲ့အခါ Program ေတြကို တင္လိုက္၊ ဖ်က္လိုက္၊ ပံုေတြကို သိမ္းလိုက္၊ ဖ်က္လိုက္နဲ ့ Hard Disk ေပၚမွာ Fragmented Files ေတြျဖစ္လာပါတယ္… Fragment ျပန္ ့က်ဲလာတာပါ… အဲဒီ့အခါ Files ေတြကို ထပ္မံသိမ္းတဲ့အခါ Hard Disk ေပၚမွာ ကြဲျပားေနတဲ့ဧရိယာေတြ ျဖစ္ေပၚလာပါတယ္… အစီအစဥ္တက် မသိမ္းႏိုင္ေတာ့ပါဘူး…

ဒါေၾကာင့္ Fragmented Files ေတြ ျပန္ ့က်ဲမေနေအာင္ Defragmenter ဆိုတာ လုပ္ေပးရတာပါ…

Disk Defragmenter ဟာ သံုးေနက် Program ေတြကို ျပန္စီေပးတာေၾကာင့္ Defragmenter လုပ္ၿပီးရင္ သံုးရတာ ျမန္လာမွာပါ… ဒါေပမဲ့ Disk Defragmenter မသံုးခင္ မိမိ Drive မွာ Error ရိွမရိွ စစ္ေဆးရပါတယ္…

Drive မွာ Error ရိွေနရင္ Defragmenter သံုးလို ့မရပါဘူး…

Defragment your hard disk

You can improve the performance of your computer by using Disk Defragmenter.

Over time, the files on a hard drive become more and more fragmented. To retrieve or save a file, the computer must use many different areas on the hard drive. Disk Defragmenter reorganizes your files to reduce fragmentation and improve the performance of your drive.

You can have Disk Defragmenter rearrange your most frequently used programs so they will start faster. You can also check a drive for errors before defragmenting the drive.

If a drive contains errors, the drive cannot be defragmented.


ကြန္ပ်ဴတာကို Disk Defragmenter လုပ္ေနခ်ိန္ အေတာအေတြင္းမွာ ကြန္ပ်ဴတာအလုပ္လုပ္ရတာ ေႏွးသြားမွာ ျဖစ္ပါတယ္… အခ်ိန္အေတာ္ယူပါတယ္… ဒါေၾကာင့္ Disk Defragmenter မလုပ္ခင္ တျခားသံုးေနတဲ့ Program ေတြကို ပိတ္ထားရင္ ပိုေကာင္းပါတယ္…

ဒါမွမဟုတ္ ကြန္ပ်ဴတာမသံုးေတာ့တဲ့အခ်ိန္မွာ Defragmenter ကို သံုးတာ အေကာင္းဆံုးပါပဲ…

You can use your computer to perform tasks while Disk Defragmenter is running, but your computer will operate more slowly. Disk Defragmenter must restart each time another program accesses the drive, so the defragmentation process will take longer. You may want to close other programs before defragmenting a drive.

It is best to defragment at a time when you are not using your computer.


မိမိကြန္ပ်ဴတာမွာ Error ရိွတယ္ဆိုရင္ေတာ့ ScanDisk ျပဳလုပ္ေပးရမွာပါ…

Standard Test လုပ္ရင္ မိမိကြန္ပ်ဴတာရဲ့ Files နဲ ့ Folders ေတြမွာ Error ရိွမရိွ စစ္ေပးတာပါ…

Thorough Test လုပ္ရင္ေတာ့ Standard Test လို လုပ္ေပးတဲ့အျပင္ Disk မ်က္ႏွာျပင္မွာ ပ်က္စီးမႈ ရိွမရိွဆိုတာပါ စစ္ေပးတာပါ… Bad Sector ဆိုတာ ၾကားဖူးမွာပါ… ScanDisk Run လို ့ မိမိ Hard Drive မွာ Bad Sector ေတြ မ်ားလာရင္ Hard Disk အသစ္လဲရတတ္ပါတယ္…

Hard Disk

ScanDisk က သာမန္ Error ကို Fix လုပ္ေပးပါတယ္…

ScanDisk ျပဳလုပ္ၿပီးရင္ မိမိ Drive ရဲ့ စစ္ေဆးခ်က္ မွတ္တမ္း ေပၚလာမွာပါ…

Check for Disk Errors

ScanDisk is a program included with Windows that detects and repairs disk errors on hard drive.

The standard test checks for errors in files and folders. The thorough test performs the same check as the standard test and also checks the disk surface for physically damages areas that can no longer be used to store information.

You can have ScanDisk automatically fix the errors it finds.

When ScanDisk is finished checking a drive, a summary appears, displaying information about the drive.


မိမိကြန္ပ်ဴတာရဲ့ Operating System Software ေပၚမူတည္၍ ပံုစံအနည္းငယ္ ကြာျခားေသာ္လည္း အေျခခံသေဘာတရားခ်င္း တူညီပါသည္။ ဥပမာ - WindowsXP, Vista, Windows 7

မိမိကြန္ပ်ဴတာကုိ ကိုယ္တိုင္ျပဳျပင္ထိန္းသိမ္းႏိုင္ၾကပါေစ…

ေခ်ာကလစ္မွ...ကူးယူေဖၚျပသည္

73-ကြန္ပ်ဴတာအေျခခံ အပိုင္း (၆)

ကြန္ပ်ဴတာအေျခခံ

အပိုင္း (၆)


ဒီေန ့ေတာ့ Network အေၾကာင္းကို ရွင္းျပပါမယ္…

သူငယ္ခ်င္းတို ့ အခုသံုးေနတဲ့ ေခ်ာ့ကလက္ၿမိဳ ့ေတာ္ဟာ Ning Network ျဖစ္ပါတယ္…

ပင္မစာမ်က္ႏွာညာဖက္ ၿမိဳ ့စားေလးပံုမွာ ေရးထားတဲ့စာေလးကို ဖတ္မိမွာပါ…

ၿမိဳ ့စားေလး Created this Ning Network ဆိုတာကို ေတြ ့ၾကမွာပါ…

ႏိုင္ငံအသီးသီးက သူငယ္ခ်င္းမ်ားက မိမိတို ့ရဲ့ ကြန္ပ်ဴတာကို အင္တာနက္နဲ ့ ခ်ိတ္ဆက္ၿပီး သတင္းအခ်က္အလက္မ်ား၊ စာေပမ်ား၊၊ သီခ်င္းမ်ား၊ Video မ်ားကို ေ၀မွ်ခံစားေစတာဟာ Network ႀကီးတစ္ခုထဲမွာ လႈပ္ရွားေနၾကတာပါ…


INTRODUCTION TO NETWORKS

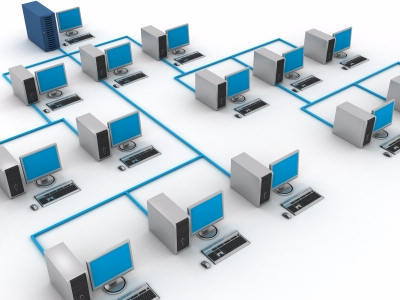
A network is a group of connected computers that allow people to share information and equipment.

Network ဆိုတာ အခ်က္အလက္ေတြ၊ ကိရိယာေတြကို ေ၀မွ်သံုးစြဲတာကို ခြင့္ျပဳတဲ့ ကြန္ပ်ဴတာအခ်င္းခ်င္း ခ်ိတ္ဆက္ထားတဲ့ အုပ္စုကို ဆိုလိုတာပါ…


Types of Networks
Network အမ်ိဳးအစားမ်ား

Local Area Network
A Local Area Network (LAN) is a network that connects computers within a small geographic area, such as a building.

Local Area Network (LAN) ဆိုတာဟာ အေဆာက္အဦတစ္ခုထဲအတြင္းမွာပဲ ကြန္ပ်ဴတာေတြကို ခ်ိတ္ဆက္အသံုးျပဳတာကို ဆိုလိုတာပါ…

ကုမၸဏီမ်ား၊ အင္တာနက္ဆိုင္ (Cyber Cafe) ေတြမွာ ကြန္ပ်ဴတာကို တစ္ခုနဲ ့တစ္ခု ခ်ိတ္ဆက္အသံုးျပဳတာကို LAN လို ့ ေခၚပါတယ္…

Wide Area Network
A Wide Area Network (WAN) is a network that connects computers across a large geographic area, such as a city or country. A WAN can transmit information by telephone line, microwave or satellite.

Wide Area Network (WAN) ဆိုတာကေတာ့ ၿမိဳ ့ေတြ၊ တိုင္းျပည္ေတြကို ျဖတ္ၿပီး ကြန္ပ်ဴတာမ်ား ခ်ိတ္ဆက္အသံုးျပဳတာကို ဆိုလိုတာပါ… WAN ကေတာ့ တယ္လီဖံုးလိုင္း (သိုးမဟုတ္) ၿဂိဳလ္တုစနစ္နဲ ့ သတင္းအခ်က္အလက္ေတြကို ေပးပို ့တာပါ…

Network Advantages
Network ဆက္သြယ္ျခင္းရဲ့ အက်ိဳးေက်းဇူးမ်ား

Work Away From Office
When traveling or at home, you can connect to the network at work to exchange messages and files.

မိမိခရီးသြားတဲ့အခါျဖစ္ေစ၊ အိမ္မွာေနရင္းျဖစ္ေစ Network ခ်ိတ္ထားမယ္ဆိုရင္ သတင္းနဲ ့ ဖိုင္မ်ားကို ဖလွယ္လို ့ ရပါတယ္…

Share Information
Networks let you easily share data and programs. You can exchange documents, electronic mail, video, sound and images.

Network ခ်ိတ္ထားျခင္းျဖင့္ အခ်က္အလက္ေတြ၊ Programs ေတြကို ေ၀မွ်လို ့ လြယ္ပါတယ္… စာေတြ၊ E-Mail ေတြ၊ Video ေတြ၊ အသံေတြနဲ ့ ႐ုပ္ပံုေတြကို ဖလွယ္လို ့ရပါတယ္…
ဆိုလိုတာကေတာ့ လြမ္းတို ့ေတြ Data ေတြကို သိမ္းဆည္းႏိုင္တဲ့ Memory Stick တို ့၊ External Harddisk တို ့ မလိုေတာ့တာပါ…

Share Equipment
Computers connected to a network can share equipment, such as a printer or modem.

Network ခ်ိတ္ထားမယ္ဆိုရင္ Printer တို ့၊ Modem တို ့၊ Scanner တို ့ကို ကြန္ပ်ဴတာအားလံုးက ေ၀မွ်သံုးစြဲႏိုင္တာပါ…


ဥပမာအားျဖင့္ အင္တာနက္ဆိုင္မွာ Modem တစ္ခုပဲ လိုပါတယ္… Computer ေတြကို Network ခ်ိတ္ထားၿပီး Internet ကို ေ၀မွ်သံုးစြဲေနတာပါ…


Network Administrator
A network administrator manages the network and makes sure the network runs smoothly. A network administrator may also be called a network manager, information systems manager or system administrator.

Network Administrator ဆိုတာဟာ Network ကို ေခ်ာေမြ ့စြာ အသံုးျပဳႏိုင္ေအာင္ စီမံ အုပ္ခ်ဳပ္ရတဲ့သူကို ဆိုလိုတာပါ… Network Administrator ကို Network Manager, Information Systems Manager ဒါမွမဟုတ္ System Administrator လို ့ ေခၚပါတယ္…

Network Applications
Network အသံုးျပဳပံုမ်ား

Electronic Mail
You can exchange electronic mail (e-mail) with other people on a network. Electronic mail saves paper and provides a fast, convenient way to exchange ideas and request information.

Network ခ်ိတ္ထားတဲ့ စက္အခ်င္းခ်င္း E-Mail ပို ့လို ့ရပါတယ္… အေတြးအေခၚ၊ ေတာင္းဆိုလိုတဲ့ သတင္းအခ်က္အလက္ေတြကို လြယ္ကူလ်င္ျမန္စြာ ပို ့ေပးၿပီး သိမ္းဆည္းထားလို ့ ရပါတယ္…
Network ခ်ိတ္ထားတဲ့ ကုမၸဏီေတြမွာဆိုရင္ ႐ံုးေရာက္တာနဲ ့ E-Mail စစ္ၾကရပါတယ္…
အစည္းအေ၀းဖိတ္စာေတြ၊ ညႊန္ၾကားခ်က္ေတြကို E-Mail နဲ ့ ပို ့တာပါ…

Videoconferencing
Videoconferencing allows you to have face-to-face conversations with other people on a network, whether they are around the corner or on the other side of the country.
A computer must have a sound card, speakers and microphone to transmit and receive sound. The computer must also have a video camera to transmit video images.

Network ခ်ိတ္ထားတဲ့ Computer ေတြမွာ မ်က္ႏွာခ်င္းဆိုင္ စကားေျပာလို ့ ရပါတယ္…
Computer မွာေတာ့ အသံကိုလက္ခံရန္ Sound Card, Speaker နဲ ့ Microphone ရိွရပါမယ္…
ပံုရိပ္ကို ျမင္ႏိုင္ရန္အတြက္ Video Camera ရိွရပါမယ္…

Parts of a Network
Network ရဲ့ အစိတ္အပိုင္းမ်ား

Network Traffic
Network traffic is the information that travels through a network. When there is a lot of network traffic, information travels more slowly through the network.

Network Traffic ဆိုတာကေတာ့ Network ကို ျဖတ္ေနတဲ့ သတင္းအခ်က္အလက္ကို ဆိုလိုတာပါ.. Network Traffic မ်ားလာတာနဲ ့အမွ် Network ကိုျဖတ္ပို ့ေနတဲ့ သတင္းအခ်က္အလက္ ပို ့ေဆာင္မႈဟာ ေႏွးသြားပါတယ္…

Hub
A hub is a device that provides a central location where all the cables on a network come together.

Network ခ်ိတ္ထားတဲ့ Computer ေတြက လာတဲ့ ႀကိဳးေတြကို တစ္ေနရာတည္းမွာ ဆက္သြယ္ထားတဲ့ ကိရိယာပါ…

ခုုဆိုရင္ Switch ဆိုၿပီး အင္တာနက္ဆိုင္ေတြမွာ သံုးပါတယ္…


Network Interface Card
A network interface card is a device that physically connects each computer to a network. This card controls the flow of information between the network and the computer.

Network ခ်ိတ္တဲ့ ကြန္ပ်ဴတာတိုင္းမွာ Network Interface Card ရိွရပါမယ္… ဒီ Card ဟာ Network နဲ ့ Computer ၾကားမွာ သတင္းအခ်က္အလက္ေပးပို ့ႏိုင္ဖို ့ ထိန္းခ်ဳပ္ေပးပါတယ္…

Cables
Cables are the wires that connect computers and equipment on a network. There are four main types of cables-coaxial, Unshielded Twisted Pair (UTP), Shielded Twisted Pair (STP), and fiber-optic.
Fiber-optic cable is the most expensive type of cable, but it can carry information faster and over longer distances than other types of cables.

Network ႀကိဳးမ်ားကို ကြန္ပ်ဴတာနဲ ့ Printer, Scanner စတဲ့ ကိရိယာေတြ ခ်ိတ္ဆက္ရာတြင္ သံုးပါတယ္…
အဓိက ႀကိဳးအမ်ိဳးအစား ေလးမ်ိဳးရိွပါတယ္…
၁။ Cables-coaxial
၂။ Unshielded Twisted Pair (UTP)
၃။ Shielded Twisted Pair (STP)
၄။ Fiber-optic
Fiber-optic ႀကိဳးကေတာ့ ေစ်းႀကီးၿပီး ေ၀းလံတဲ့အကြာအေ၀းေတြမွာ သတင္းအခ်က္အလက္ကို လ်င္ျမန္စြာ ပို ့ေဆာင္ေပးႏိုင္ပါတယ္…

How Information is Stored
သတင္းအခ်က္အလက္မ်ား သိမ္းဆည္းပံု

Peer-To-Peer Network
All the people on a peer-to-peer network store their files on their own computers. Anyone on the network can access files stored on any other computer.
A peer-to-peer network provides a simple and inexpensive way to connect fewer than ten computers.


Peer-To-Peer Network ခ်ိတ္ထားတဲ့ Computer ေတြဟာ မိိမိစက္မွာပဲ ဖိုင္မ်ားကို သိမ္းဆည္းပါတယ္… မိမိသိမ္းဆည္းထားေသာ ဖိုင္ကို Network ခ်ိတ္ထားတဲ့ Computer တိုင္းက အသံုးျပဳလို ့ ရပါတယ္…
Peer-To-Peer Network ဆက္သြယ္ပံုက ႐ိုးရွင္းၿပီး အကုန္အက်နည္းပါတယ္…
၁၀-လံုးထက္နည္းတဲ့ Computer ေတြကို ခ်ိတ္ဆက္ရာမွာ အသံုးျပဳပါတယ္…

Manage Files
Files are stored in many different locations. This makes the files difficult to manage, back-up and protect. However, if one computer malfunctions, the rest of the network will not be affected.

ဖိုင္ေတြကို ေနရာအမ်ိဳးမ်ိဳးမွာ သိမ္းဆည္းထားတဲ့အတြက္ ဖိုင္ကို ထိန္းခ်ဳပ္ဖို ့ ၊ Back-up လုပ္ဖို ့၊ ဖိုင္ကို မေပ်ာက္ပ်က္ေအာင္ ကာကြယ္ဖို ့ ခက္ပါတယ္…
Back-up လုပ္တယ္ဆိုတာ မိမိအေရးႀကီးတဲ့ဖိုင္ေတြကို ေနာက္တစ္ေနရာမွာ ထပ္ၿပီး သိမ္းဆည္းထားတာကို ဆိုလိုတာပါ…
ဒါေပမဲ့ ကြန္ပ်ဴတာတစ္လံုး အလုပ္မလုပ္ေတာ့ဘူးဆိုရင္ က်န္တဲ့ Network ခ်ိတ္ထားတဲ့ Computer ကို မထိခိုက္ေစႏိုင္ပါဘူး…

CLIENT/SERVER NETWORK
All the people on a client/server network store their files on a central computer. Everyone connected to the network can access the files stored on the central computer.
A client/server network provides a highly efficient way to connect ten or more computers or computers exchanging large amounts of information.


Client/Server Network ဆိုတာ Network ခ်ိတ္ထားတဲ့ Computer အားလံုးက Files ေတြကို ပင္မကြန္ပ်ဴတာတစ္ခုထဲမွာပဲ သိမ္းဆည္းတာကို ဆိုလိုတာပါ…
လူတိုင္းက ပင္မကြန္ပ်ဴတာထဲက သိမ္းထားတဲ့ ဖိုင္ေတြကို သံုးလို ့ရပါတယ္…
Client/Server Network ဟာ ၁၀-လံုးထက္ ပိုမိုတဲ့ ကြန္ပ်ဴတာမ်ား ခ်ိတ္ဆက္ၿပီး မ်ားစြာေသာ သတင္းအခ်က္အလက္ေတြ ဖလွယ္တဲ့ေနရာမွာ ထိေရာက္စြာ အသံုးျပဳႏိုင္ပါတယ္…

Server
The server is the central computer that stores the files of every person on the network.

Server ဆိုတာ Network ေပၚမွာ ရိွတဲ့ လူတိုင္းက ဖိုင္ေတြကို သိမ္းႏိုင္တဲ့ ပင္မကြန္ပ်ဴတာကို ဆိုလိုတာပါ…

Manage Files
All the files are stored on the server. This makes the files easy to manage, back-up and protect. However, if the server malfunctions, the entire network will be affected.

ဖိုင္မ်ားအားလံုးကို Server မွာပဲ သိမ္းဆည္းထားတဲ့အတြက္ ဖိုင္မ်ားကို လြယ္ကူစြာ ထိန္းခ်ဳပ္ႏိုင္ပါတယ္… Back-up လုပ္ဖို ့ နဲ ့ ကာကြယ္ဖို ့ လြယ္ကူပါတယ္…

Client
A client is a computer that can access information stored on the server.

Client ဆိုတာ Server မွာရိွတဲ့ သတင္းအခ်က္အလက္ေတြကို သံုးစြဲႏိုင္တဲ့ ကြန္ပ်ဴတာကို ဆိုလိုတာပါ…

Intranet
An intranet is a small version of the Internet inside an office.

မိမိ႐ံုးအတြင္းမွာပဲ Internet လို သံုးႏိုင္တာကို Intranet လို ့ ေခၚပါတယ္…
Intranet မွာ မ်ားေသာအားျဖင့္ မိမိကုမၸဏီသတင္းအခ်က္အလက္မ်ားကို ၀န္ထမ္းမ်ားသိေစရန္ Webpage ျပဳလုပ္တင္ထားေလ့ရိွပါတယ္…

ဒီေလာက္ဆိုရင္ Network နဲ ့ပတ္သက္ၿပီး သိၿပီလို ့ ယူဆပါတယ္…

ဒီေနရာမွာ အင္တာနက္ဆိုတဲ့ အဓိပၸါယ္ေလးကို ေျပာျပခ်င္ပါတယ္…

The Internet is the largest computer network in the world.

အင္တာနက္သံုးရင္း ကြန္ပ်ဴတာနည္းပညာမ်ား ေလ့လာႏိုင္ၾကပါေစ…
 ေခ်ာကလစ္မွ..ကူးယူေဖၚျပသည္